PHOTOGRAPHY I - PROJECTS
“To me, photography is an art of observation. It’s about finding something interesting in an ordinary place… I’ve found it has little to do with the things you see and everything to do with the way you see them.”
— Elliott Erwitt
— Elliott Erwitt
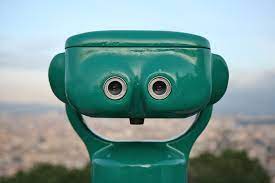
PROJECT #1 - Faces in Places
|
What is due: 7 Photos.
Objective: This exercise is to help you see the world a little differently and to also help you to pay attention to details around you. Photograph 7 different faces in places. They need to be naturally occurring in architecture, objects, clothing, or nature. Look at big things or look at really small things. Look at things sideways or upside down to try and find awesome faces. Naming your photos: yourname_face01, yourname_face02, etc. |
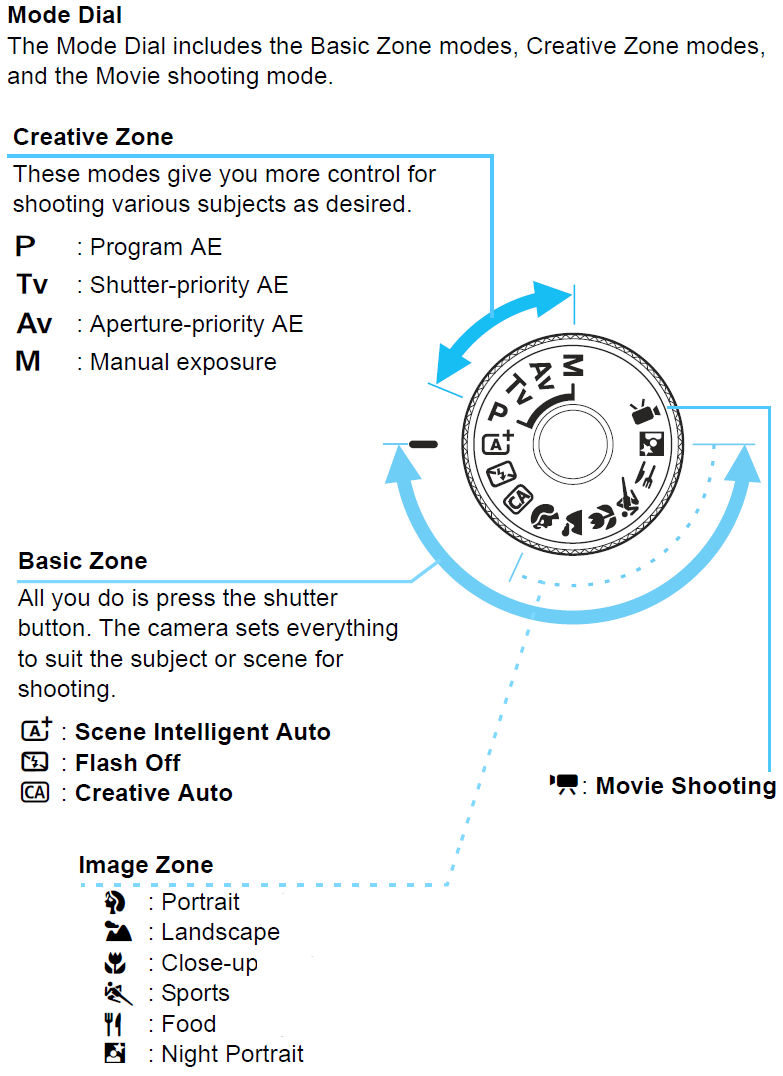
PROJECT #2 - Camera Modes
|
What is due: 10 photos.
Objective: to gain a basic understanding of how camera modes work and to demonstrate the use of those modes as discussed in class. Cameras have modes a photographer can use for various situations. Pay attention to how the photos change when the environment changes even though you're using the same camera mode. Portrait Mode Portrait mode is the ideal setting for capturing shots with a single person or object as the main subject. Take Two Photos using Portrait Mode.
Landscape Mode Landscape mode is suitable for shooting wide shots and getting everything in focus. Take Two Photos using Landscape Mode.
Sports Mode Photographing moving objects is what Sports Mode is designed to do. It is also called Action Mode on some cameras. Take Two Photos using Sports Mode.
Night / Night Portrait Mode / TV (Shutter Priority) Night mode is for shooting in low light situations and uses a slow shutter speed. Use some movement of a subject or the camera or moving light to make these fun. Take Two Photos using Night Mode.
Macro Mode Macro mode lets you move closer to your subject to take a close up picture and have a shallow depth of field. Take Two Photos using Macro Mode.
|
|
PROJECT #2 - Camera Modes Part 2
What is due: 5 Photos.
Objective: Choose one of the Camera Modes you just practiced and create a series of 5 images. Utilize the effects of that certain mode. Keep in mind location, subject, lighting and framing (how you place your photo in the camera).
Objective: Choose one of the Camera Modes you just practiced and create a series of 5 images. Utilize the effects of that certain mode. Keep in mind location, subject, lighting and framing (how you place your photo in the camera).
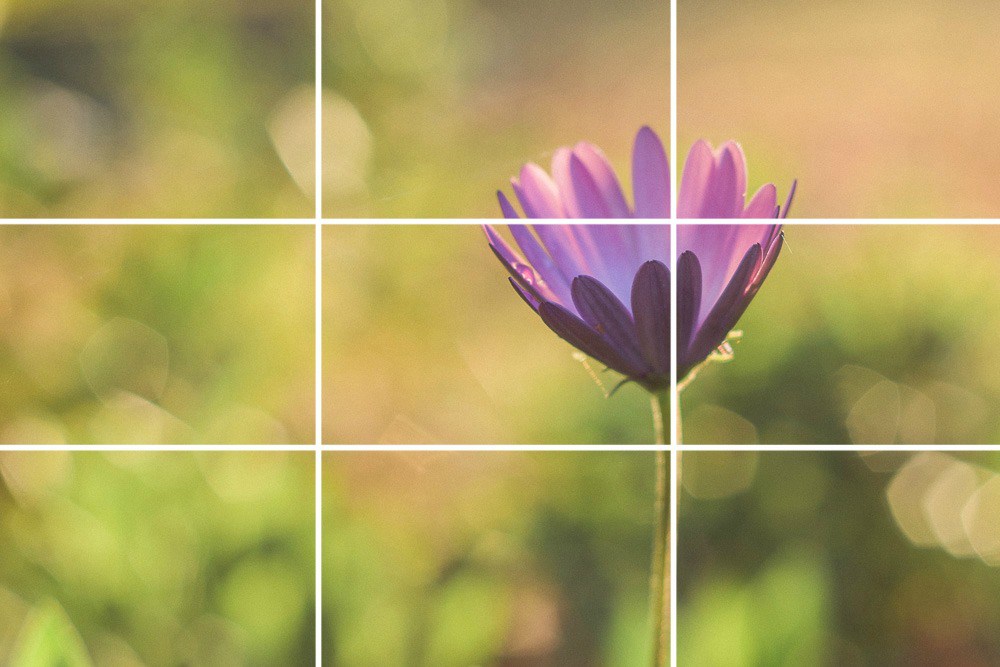
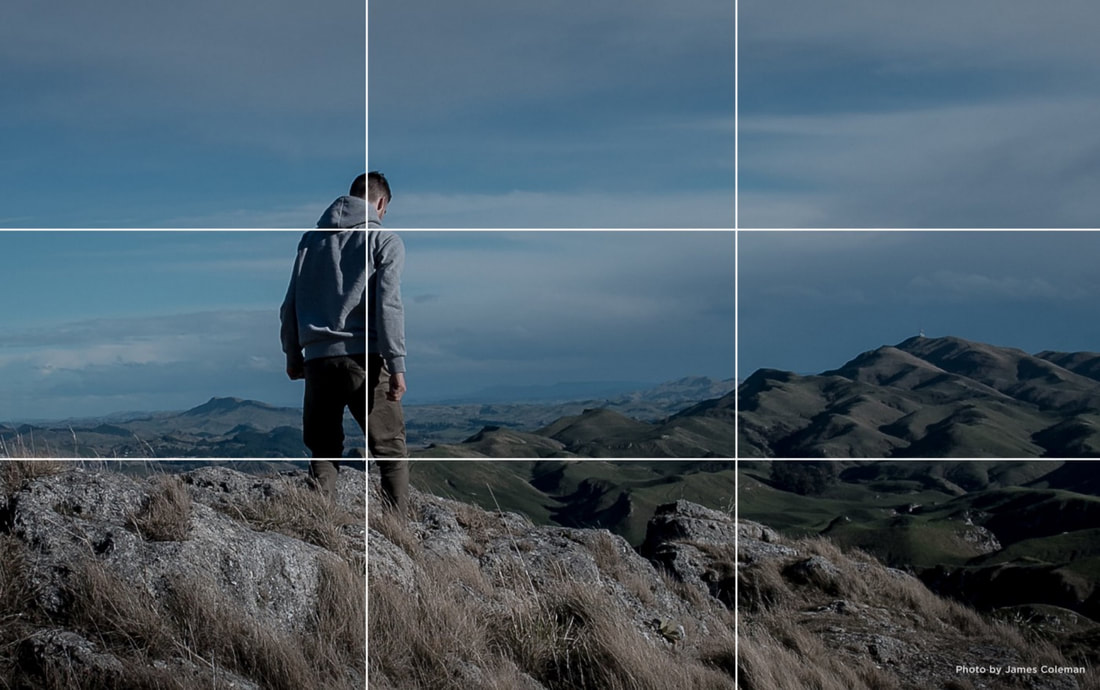
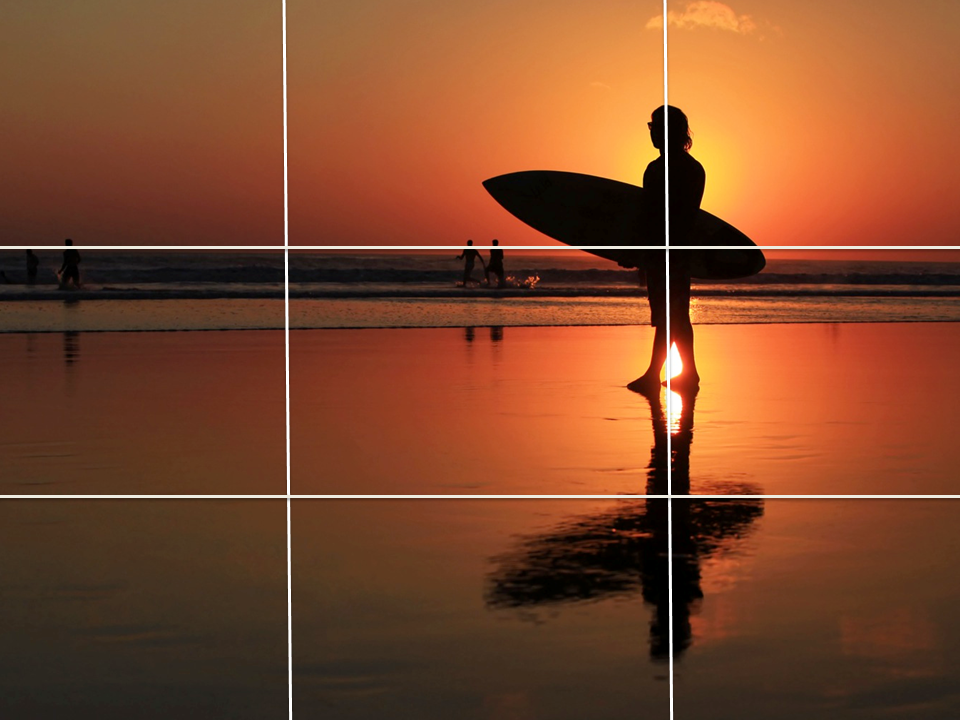
PROJECT #3 - Rule of Thirds
|
What is due: 9 Photos
The rule of thirds involves dividing up your image using 2 horizontal lines and 2 vertical lines. You then position the important elements in your scene along those lines, or at the points where they meet. Those points create visual tension and the viewers eyes are drawn to those areas of a photograph. Explore the school to find 9 interesting subjects (person, a leaf, bug, vehicle, etc.) that you can photograph following the rule of thirds. Challenge yourself to do everything in your camera - No Cropping! |
|
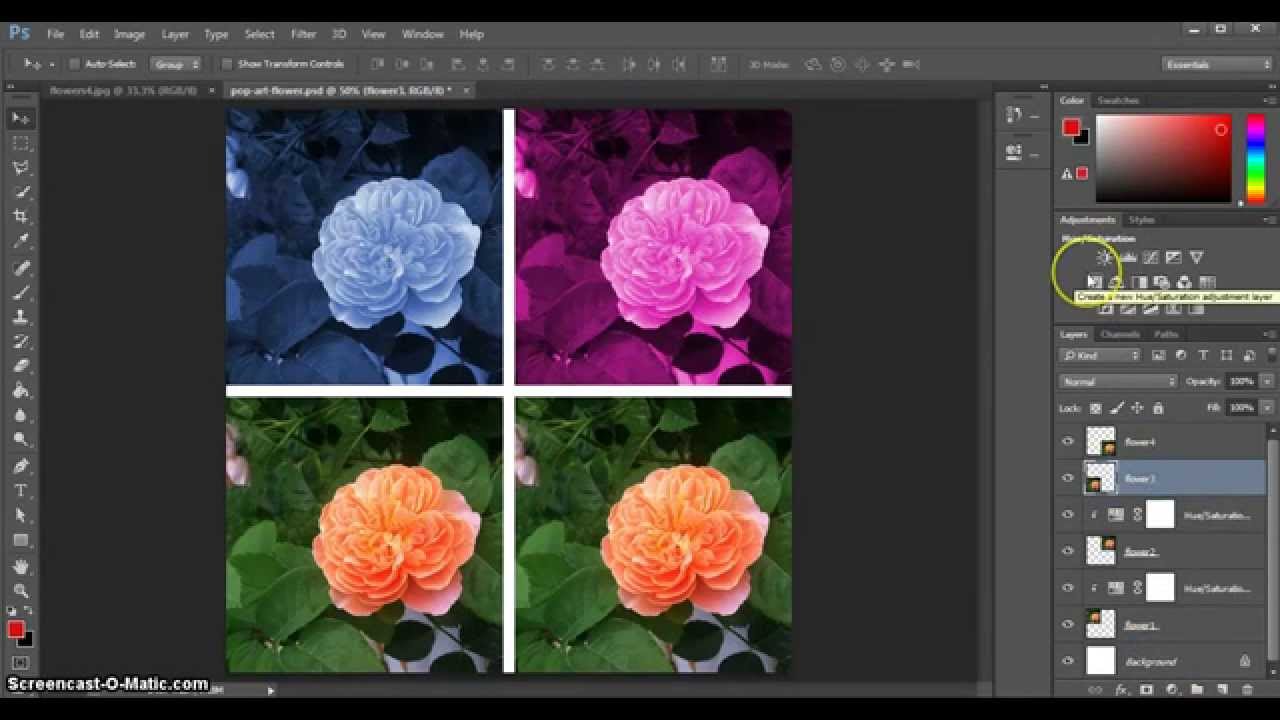
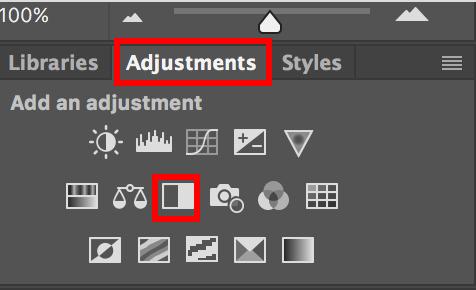
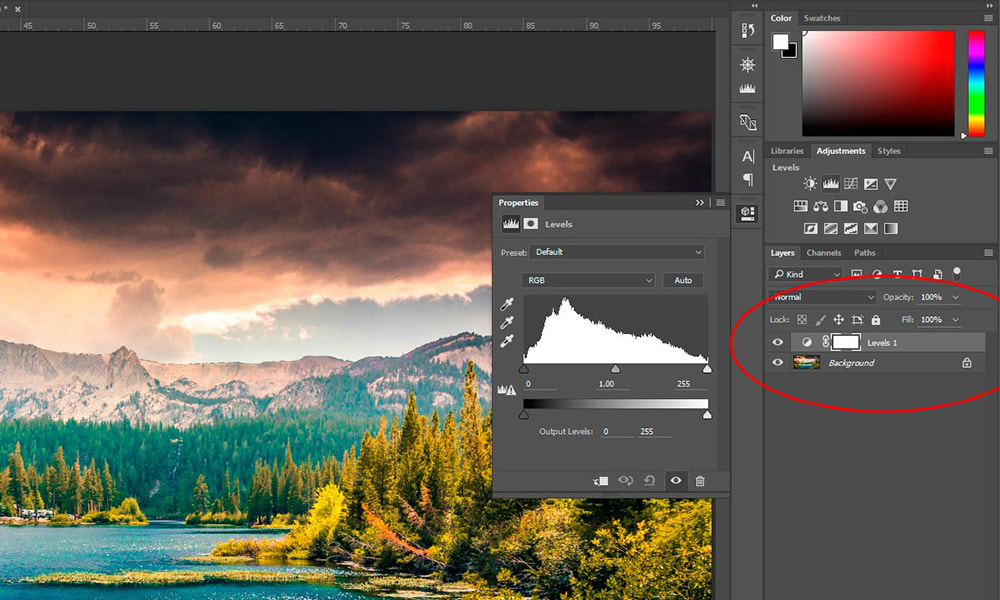
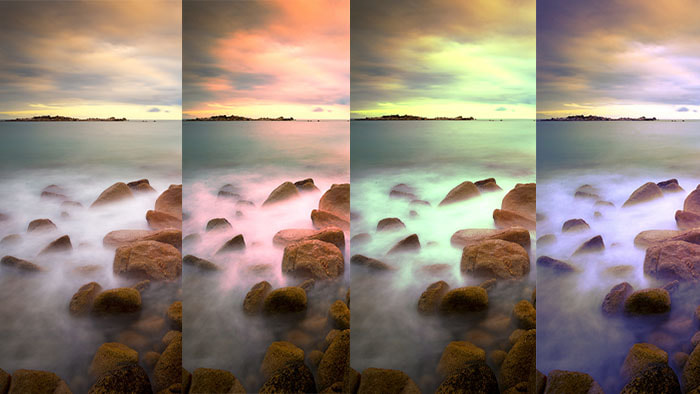
PROJECT #4 - 15 Versions (Intro to Adjustment Layers)
|
What is due: 15 Versions of 1 Image using the following Adjustment Layers.
Objective: Learn how to use Adjustment Layers, and get familiar with different effects and applications Apply the following Adjustment Layers for the Project:
Use one of your photographs from the Rule of Thirds project to create 15 versions of the same image using adjustment layers. Saving and naming will be an important part of this project.
|
|
PROJECT #5 - Alphabet in Nature
Objective: Practice seeing the world and showing everyday objects in an interesting way.
What is due? 26 photos. Each photo of is something that visually represents a letter in the alphabet.
What is due? 26 photos. Each photo of is something that visually represents a letter in the alphabet.
PROJECT #6 - Perspective Grid
What is due: 6 images of varying perspectives. Images will be organized on one final layout
- Looking Up
- Looking Down
- Centered
- Close up
- Wide Angle
- Diagonal
PROJECT #7 - Photobombing Aperture Practice
|
What is due: 6 edited photos (3 large aperture, 3 small aperture).
Objective: Show the effects of aperture and distance by photobombing each others portrait photos. For this assignment you will practice taking long, medium, and close up photos with different apertures. See the list below for which photos you need. To accomplish this, The photobomber will need to photo bomb from three distances.
|
|
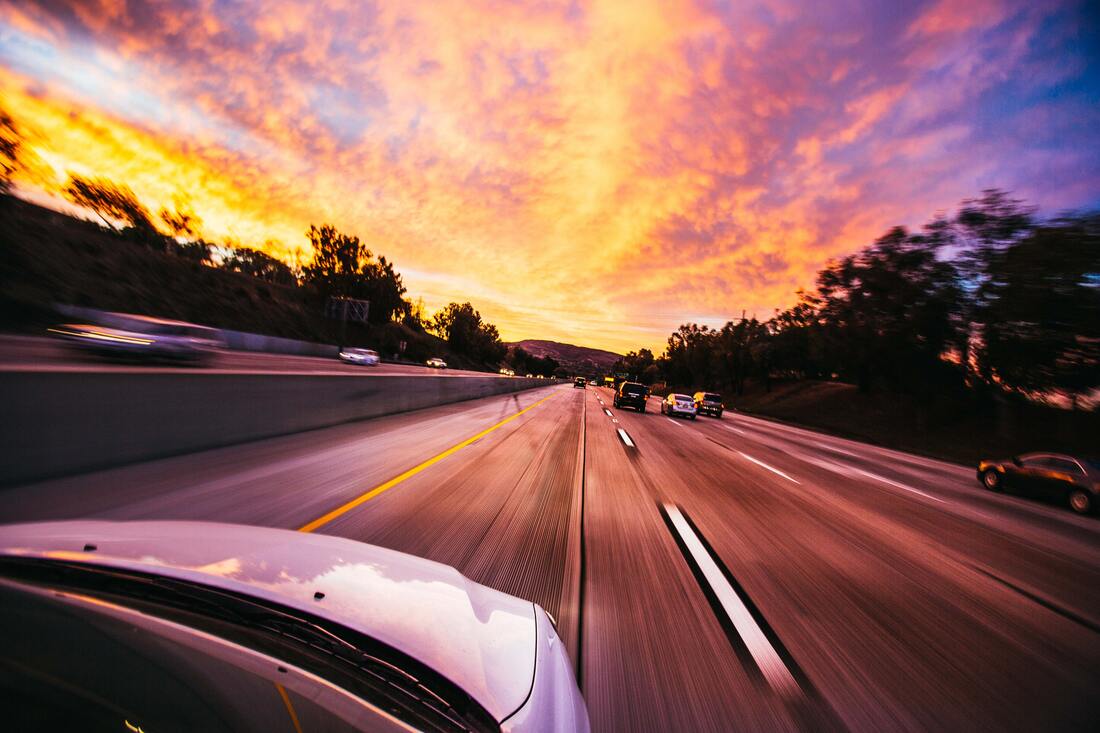
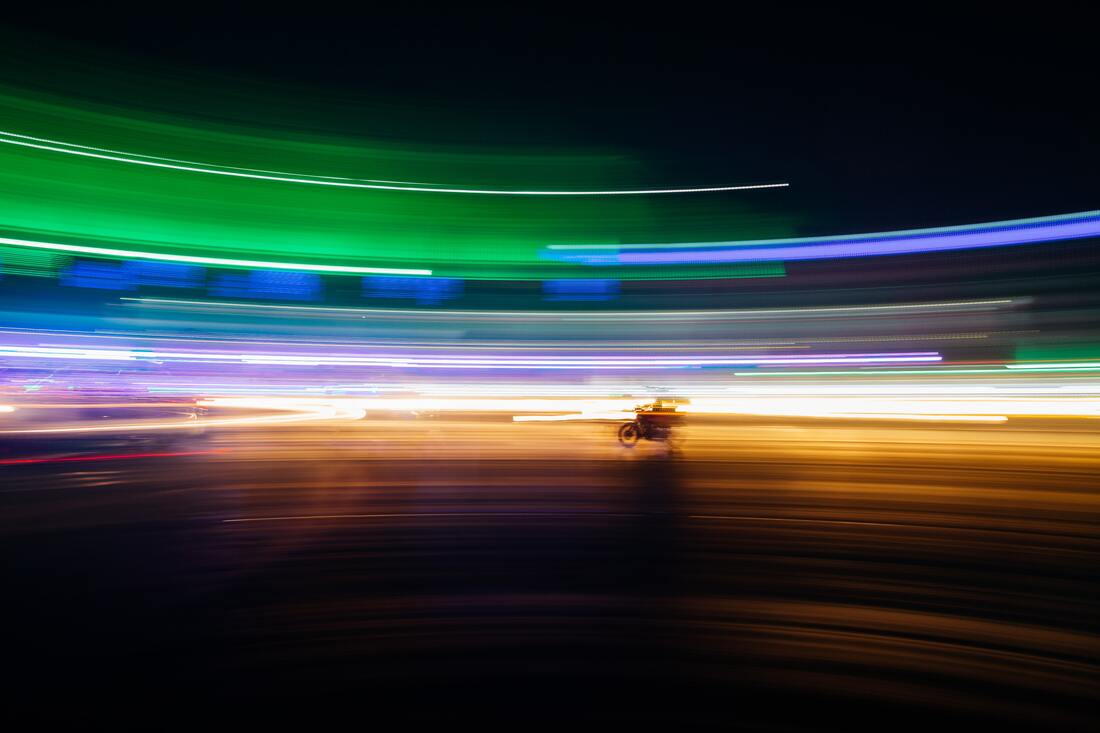
PROJECT #8 - Shutter Speed Practice
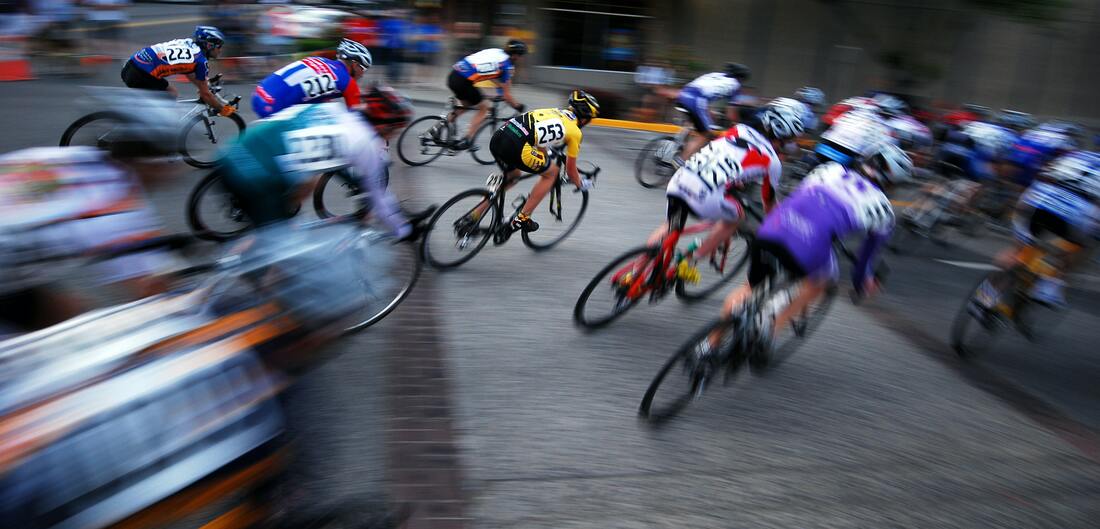
|
Objective - Understand how shutter speed effects motion in an image.
What is Due - 9 photos using the shutter speeds listed below. All photos will be shot in shutter priority mode (TV). You control the shutter speed in shutter priority mode while the camera controls the other settings to get a correct exposure. Make sure ISO is set to Auto. You will also practice controlling focal points, focus locking, and using a tripod. Students may find it easiest to work in pairs for this assignment. Each student will take 1 photo for each shutter speed listed below. As the shutter speeds get slower, you will see more blur in your images. You will want to you a tripod with certain shutter speeds. In addition, practice different techniques like panning and follow focus. Set the focal point to the center and focus on the subject while it is holding still. When the camera beeps, it is focused. Keep holding the shutter release button down halfway to let the subject start the movement. Take the photo to capture the motion (blurred or frozen). Also practice taking good photos by using principles of composition and be aware of what’s in the background of your photo. 1 Photo at the following shutter speeds.
|
PROJECT #9 - Crayon Inspired Images
Objective: Practice using color as your major design element. Creating a series of images with a similar concept.
What is due? 5 images where your chosen color is the overriding design element.
What is due? 5 images where your chosen color is the overriding design element.